


In this tutorial we are assuming that you have already move your domain to Cloudflare DNS service and your domain are currently control by Cloudflare control panel.
Step1: Configure Nginx to Https
Assuming you have already install nginx web server in your current node.
Create a directory for store all our key and certification with below command:
mkdir /etc/nginx/ssl
Use below command to create self sign certification and key for https.
openssl req -x509 -nodes -days 365 -newkey rsa:2048 -keyout /etc/nginx/ssl/nginx.key -out /etc/nginx/ssl/nginx.crt
after this command you will get a list of question that you need to be answer like below:
Country Name (2 letter code) [AU]:US
State or Province Name (full name) [Some-State]:New York
Locality Name (eg, city) []:New York City
Organization Name (eg, company) [Internet Widgits Pty Ltd]:Bouncy Castles, Inc.
Organizational Unit Name (eg, section) []:Ministry of Water Slides
Common Name (e.g. server FQDN or YOUR name) []:your_domain.com
Email Address []:admin@your_domain.com
After this all question you will see 2 thing in /etc/nginx/ssl/
nginx.key
nginx.crt
That all for creating your own cert and key for your nginx.
Step2: Configure nginx to use SSL (HTTPS)
Firstly you will see your server block should be like below:
server {
listen 80 default_server;
listen [::]:80 default_server ipv6only=on;
root /usr/share/nginx/html;
index index.html index.htm;
server_name your_domain.com;
location / {
try_files $uri $uri/ =404;
}
}
We will add few line and below like below:
server {
listen 80 default_server;
listen [::]:80 default_server ipv6only=on;
listen 443 ssl;
root /usr/share/nginx/html;
index index.html index.htm;
server_name your_domain.com;
ssl_certificate /etc/nginx/ssl/nginx.crt;
ssl_certificate_key /etc/nginx/ssl/nginx.key;
location / {
try_files $uri $uri/ =404;
}
}
Save and quit with your configuration, and restart your nginx Web Server.
systemctl restart nginx
OR
service nginx restart
Step3: Test http and https website.
First you can try access your domain with HTTP
http://domain.com
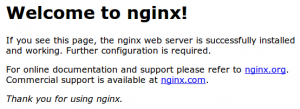
Now we turning to try the HTTPS.
https://domain.com
and you will get something like below:
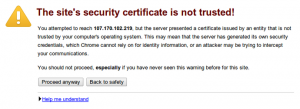
It is telling you that your site is not secure ,because currently we are using our self sign certification which is not trusted by any browser.
Before Proceed to step4, we assume you are getting your nginx web server working properly like our screenshot above.
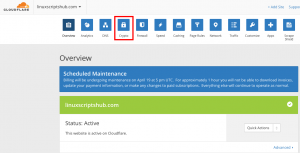
Step4: Activate https from Cloudflare
- Login to your Cloudflare Account with this link. https://www.cloudflare.com/a/login
After Login you choose your domain accordingly.You will see something like below, and please click on Crypto as the image.
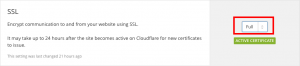
After Enter the page of Crypto, please set your SSL tab to become Full like Below:
And Click the Dns Tab on top of the page, you will saw the cloud icon beside your domain name, activate it and make it pass through Cloudflare CDN, and this is a must activate to make the https become Green. Like Below:
And After few Minutes you try to access https://domain.com with no cache on your browser, you will green something like below:
![]()
If after all this step, your https is still not Green, it could be you have mix content on your website.
With a very easy move, you can rewrite all the http link to https with cloudflare.
Go to Crypto tab again
Scroll Down until the end until you saw below word:
Automatic HTTPS Rewrites
and turn it on, after few minutes, all your insecure mix content will be changes to https without changing your origin server link.
It is now all handle over Cloudflare CDN.


Leave a Reply
Want to join the discussion?Feel free to contribute!