

Introduction
In the article we are going to brings you to build your own VPN server.
What is Virtual Private network?
Basically, VPN nowadays are more to use for unblocking some GEO-RESTRICTED content online.
How about if you found out you really need a secure VPN server to make transaction online or secure your own location?
Prerequisites
Before we start, you may need to get a server across some of the Server Provider
ie: Digital Ocean , Google Cloud , Amazon Ec2
Both of the Provider Offer a Very Good Pricing for the instance. It is calculate by hours, days or month as well.
Which is very suitable for short term user and also long term user to self customise the pricing of instance.
We will demonstrate the process using DigitalOcean.
Pick your Server
- Go to www.digitalocean.com
- Signup an account through this link https://cloud.digitalocean.com/registrations/new
- Login your account using this link https://cloud.digitalocean.com/login
After Login you will see some similar screen like below:

Create Droplet
Press on the green Color Button “Create Droplet”
Choose an image
And Choose your Image ie: CentOs or Ubuntu
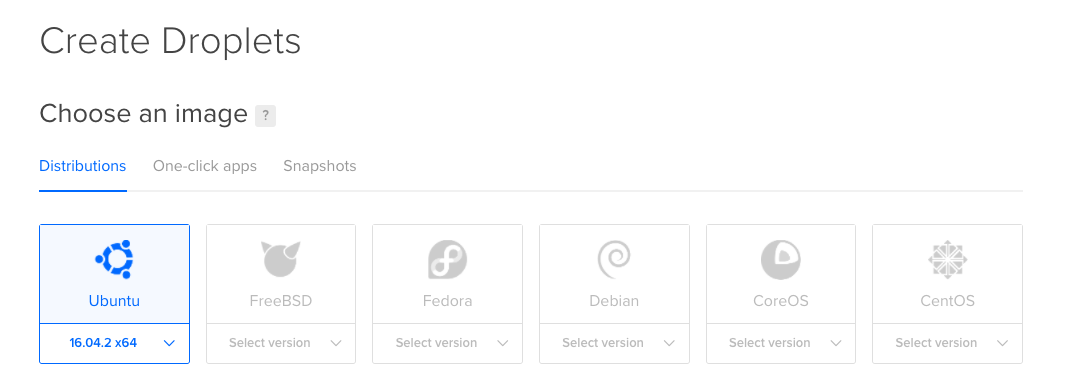
In this tutorial we will Demonstrate based on Ubuntu 16.04 x64bit.
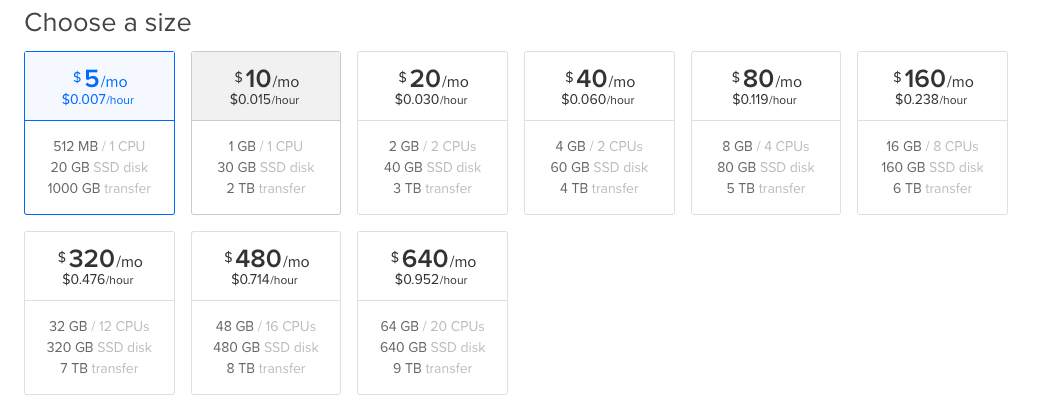
Choose a size
Choose a size and spec that meet your requirement for building your own VPN server.
If you are just building this for your own between one or two vpn user, Choose the $5/month which is very cheap and enough for your use.
After Select Operating system and the size of the cloud instance.
Choose a datacenter region
We will need to decide which country should we locate our VPN server.
In here we will decide to get Singapore Server which is where we wish our vpn server located.
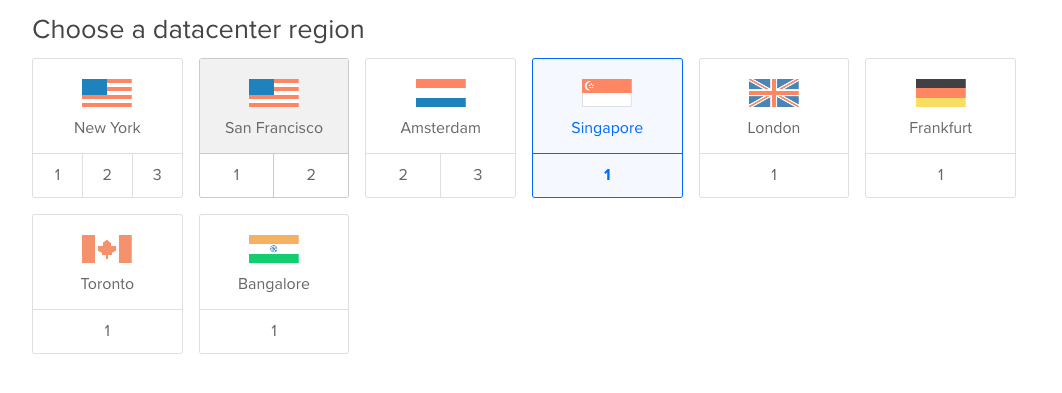
Tab on the Singapore Flag, and its done.
Finalize and Create
The last step you can setup your server hostname and Press the “Create” Button at the end of the page.
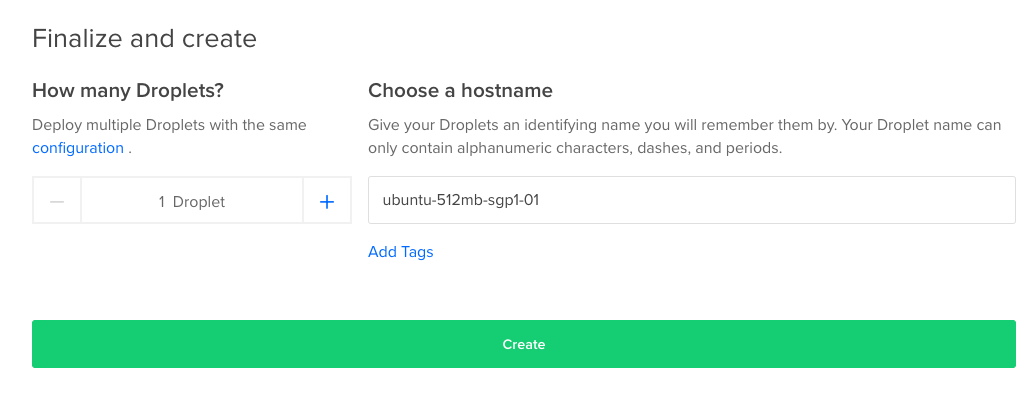
After all these thing , you will get an email from digitalocean which is contains username of the server and the password.
Login to your server and start our VPN installation.
Install Openvpn on Ubuntu16.04.02 x64bit.
Step1: Install Require Package.
sudo apt-get update
sudo apt-get install openvpn easy-rsa
Step2: Create CA directory on our home Directory using below command.
make-cadir ~/openvpn-ca
Step 3: Configure the CA Variables
cd ~/openvpn-ca/
in ~/openvpn-ca/vars
Changes below content to match your country information.
. . .
export KEY_COUNTRY=”US”
export KEY_PROVINCE=”CA”
export KEY_CITY=”SanFrancisco”
export KEY_ORG=”Fort-Funston”
export KEY_EMAIL=”me@myhost.mydomain”
export KEY_OU=”MyOrganizationalUnit”. . .
to
export KEY_COUNTRY=”SG”
export KEY_PROVINCE=”SG”
export KEY_CITY=”Geylang”
export KEY_ORG=”Geylang”
export KEY_EMAIL=”linuxscriptshub@gmail.com”
export KEY_OU=”MyOrganizationalUnit”
and also look for the KEY_NAME
export KEY_NAME=”EasyRSA”
Changes to
export KEY_NAME=”Server”
After that save and close the file.
Step 4: Build the Certificate Authority
ensure you are in the openvpn-ca folder and source the vars file we set earlier.
cd ~/openvpn-ca/
source vars
You should see the following if it was sourced correctly:
Output
NOTE: If you run ./clean-all, I will be doing a rm -rf on /home/sammy/openvpn-ca/keys
Run below command to make sure we start in a very clean Environment.
./clean-all
and Run below command to Build Our ca key
./build-ca
You will get something like below:
Generating a 2048 bit RSA private key
……………………..+++
…..+++
writing new private key to ‘ca.key’
—–
You are about to be asked to enter information that will be incorporated
into your certificate request.
What you are about to enter is what is called a Distinguished Name or a DN.
There are quite a few fields but you can leave some blank
For some fields there will be a default value,
If you enter ‘.’, the field will be left blank.
—–
Country Name (2 letter code) [SG]:
State or Province Name (full name) [SG]:
Locality Name (eg, city) [Geylang]:
Organization Name (eg, company) [Geylang]:
Organizational Unit Name (eg, section) [MyOrganizationalUnit]:
Common Name (eg, your name or your server’s hostname) [Geylang CA]:
Name [Server]:
Email Address [linuxscriptshub@gmail.com]:
Step 5: Create the Server Certificate, Key, and Encryption Files
Build our server.key using below command.
./build-key-server server
you will get the result like below:
Note the text with red you cant press enter key, you must press “y” to confirm sign the cerification.
Generating a 2048 bit RSA private key
…………………….+++
……………………………………………………………+++
writing new private key to ‘server.key’
—–
You are about to be asked to enter information that will be incorporated
into your certificate request.
What you are about to enter is what is called a Distinguished Name or a DN.
There are quite a few fields but you can leave some blank
For some fields there will be a default value,
If you enter ‘.’, the field will be left blank.
—–
Country Name (2 letter code) [SG]:
State or Province Name (full name) [SG]:
Locality Name (eg, city) [Geylang]:
Organization Name (eg, company) [Geylang]:
Organizational Unit Name (eg, section) [MyOrganizationalUnit]:
Common Name (eg, your name or your server’s hostname) [server]:
Name [Server]:
Email Address [linuxscriptshub@gmail.com]:Please enter the following ‘extra’ attributes
to be sent with your certificate request
A challenge password []:
An optional company name []:
Using configuration from /root/openvpn-ca/openssl-1.0.0.cnf
Check that the request matches the signature
Signature ok
The Subject’s Distinguished Name is as follows
countryName :PRINTABLE:’SG’
stateOrProvinceName :PRINTABLE:’SG’
localityName :PRINTABLE:’Geylang’
organizationName :PRINTABLE:’Geylang’
organizationalUnitName:PRINTABLE:’MyOrganizationalUnit’
commonName :PRINTABLE:’server’
name :PRINTABLE:’Server’
emailAddress :IA5STRING:’linuxscriptshub@gmail.com’
Certificate is to be certified until May 5 10:29:03 2027 GMT (3650 days)
Sign the certificate? [y/n]:y
1 out of 1 certificate requests certified, commit? [y/n]y
Write out database with 1 new entries
Data Base Updated
Build dhparam with below Command:
./build-dh
something like the diagram.

Generate ta.key for our VPN server.
openvpn --genkey --secret keys/ta.key
after that we are done all the thing for the server side.
And we have to continue to create the key file and cert for our client.
Step 6: Generate a Client Certificate and Key Pair
Using below command and create a pair of key for out client.
cd ~/openvpn-ca
source vars
./build-key client1
Step 7 : Configure Server.conf of the VPN server.
Copy some of the file that we create early to the /etc/openvpn folder
sudo cp ca.crt ca.key server.crt server.key ta.key dh2048.pem /etc/openvpn
We need to unzip a sample config file to the Openvpn Main directory.
gunzip -c /usr/share/doc/openvpn/examples/sample-config-files/server.conf.gz | sudo tee /etc/openvpn/server.conf
Continue to Edit our Server.conf that we just copied.
vi /etc/openvpn/server.conf
Basic Configuration
First, find the HMAC section by looking for the tls-auth directive. Remove the “;” to uncomment the tls-auth line. Below this, add the key-direction parameter set to “0”:
/etc/openvpn/server.conf
tls-auth ta.key 0 # This file is secret
key-direction 0
Next, find the section on cryptographic ciphers by looking for the commented out cipher lines. The AES-128-CBC cipher offers a good level of encryption and is well supported. Remove the “;” to uncomment the cipher AES-128-CBC line:
/etc/openvpn/server.conf
cipher AES-128-CBC
Below this, add an auth line to select the HMAC message digest algorithm. For this, SHA256 is a good choice:
/etc/openvpn/server.conf
auth SHA256
Finally, find the user and group settings and remove the “;” at the beginning of to uncomment those lines:
/etc/openvpn/server.conf
user nobody
group nogroup
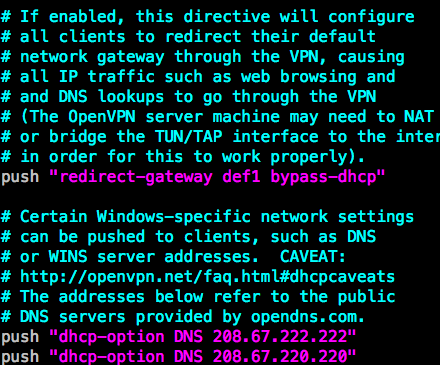
And we must push all the traffic through vpn server and to confirm that we serve the website securely and hide our origin ip addresses.
uncomment 3 thing like below:
in the end of the file please make sure your key and cert are pointing the correct name of the cert ie: server.key, server.crt.

Step8 : Enable Ip forwarding on your Server
vi /etc/sysctl.conf
add below line in the file.
net.ipv4.ip_forward=1
Save and Exit the file and enable it by the following command.
sysctl -p
And enable interface MASQUERADE using iptables.
iptables -t nat -A POSTROUTING -s 10.8.0.0/24 -o enp0s3 -j MASQUERADE
Step9 : Start your openvpn Server
using systemctl to start your openvpn server.
systemctl start openvpn@server
Run below command and make sure your openvpn port u1194 is start.
netstat -ntulp |grep openvpn
you will see the result like below:
udp 0 0 0.0.0.0:1194 0.0.0.0:* 2876/openvpn
That all for VPN server creation.
If you found you dont know how to connect to the VPN when you trying to create client1.ovpn.
Kindly please leave a comment here, and we will show you how you may do it.
Share this yours friends if you found this is useful.


Leave a Reply
Want to join the discussion?Feel free to contribute!