In this article ,we will showing you the basic way of implement multiple ip address within one vpn server.
Here is Tutorial for PPTP Vpn Server With Multi External IP Setup.
Here We Go.
Step 1 : Check whether the system kernel supports MPPE
modprobe ppp-compress-18 && echo OK
Display OK Indicates that the system supports MPPE
Step 2: Check whether the system to open TUN / TAP support
cat /dev/net/tun
If this command shows the result as the following text, it indicates that pass
cat: /dev/net/tun: File descriptor in bad state
Step 3: Check whether PPP supports MPPE
strings/usr/sbin/pppd|grep-i mppe |wc--lines
If the above command output is “0” that does not support; output is “30” or greater number that support, MPPE (Microsoft Point to Point Encryption, Microsoft point to point encryption)
Step 4:Installation of ppp and iptables
yum install -y ppp iptables
yum install epel-release
yum install pptpd
Step 5: Configure PPTP and add following content
Add the following content and uncomment the content:
vi /etc/ppp/options.pptpd
name pptpd #Self-set VPN server name can be arbitrary
#Refuse-pap #reject pap authentication
#Refuse-chap #reject chap authentication
#Refuse-mschap #reject mschap authentication
Require-mschap-v2 #For the highest security, we use the mschap-v2 authentication method
Require-mppe-128 #uses 128-bit MPPE encryption
Ms-dns 8.8.8.8 #Set DNS
Ms-dns 8.8.4.4 #Set DNS
Proxyarp
#debug #Close debug
lock
nobsdcomp
novj
novjccomp
#nologfd #Do not enter the run information to stderr
Logfile /var/log/pptpd.log #Store the logs that the pptpd service runs
Step 6: Configure VPN account and password
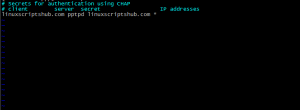
vi /etc/ppp/chap-secrets
Step 7: Configure the user to dial the address after the virtual network card has been the address.
cp /etc/pptpd.conf /etc/pptpd.conf.bak
vi /etc/pptpd.conf
ppp /usr/sbin/pppd
option /etc/ppp/options.pptpd
logwtmp
listen 192.123.45.3
localip 10.0.3.2
remoteip 10.0.3.3
Step 8: Turn on system kernel forwarding
vi /etc/sysctl.conf
Net.ipv4.ip_forward = 1
After the editing is saved, execute the following command on the shell terminal to make the configuration take effect immediately.
/sbin/sysctl -p
The configuration takes effect immediately, but the system reboots.
Step 9:Configure the firewall NAT forwarding
Centos 7 default firewalld dynamic firewall, I am more accustomed to using iptables 🙂
yum install iptables-services
systemctl stop firewalld.service
systemctl disable firewalld.service
yum erase firewalld
systemctl enable iptables.service
systemctl start iptables.service
Step 10:POSTROUTING all of the IP like below:
/sbin/iptables  -t nat -A POSTROUTING -s 10.0.3.3/24 -o eno1 -j SNAT --to-source 192.123.45.3
/sbin/iptables  -t nat -A POSTROUTING -s 10.0.4.3/24 -o eno1 -j SNAT --to-source 192.123.45.4
/sbin/iptables  -t nat -A POSTROUTING -s 10.0.5.3/24 -o eno1 -j SNAT --to-source 192.123.45.5
/sbin/iptables  -t nat -A POSTROUTING -s 10.0.6.3/24 -o eno1 -j SNAT --to-source 192.123.45.6
Final Step,configure multi IP config File and Let RockFollowing Step 7 , after the added the LISTEN , how you can used all the ip , how to use it?
Check it on below :
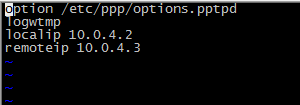
Do the same config file at /etc/ppp/config , and so on , it was look like this :

The config file will look like this :
File name : pptp5.conf
option /etc/ppp/options.pptpd
logwtmp
localip 10.0.5.2
remoteip 10.0.5.3
File name : pptp6.conf
option /etc/ppp/options.pptpd
logwtmp
localip 10.0.6.2
remoteip 10.0.6.3
After done the config file created ,run below command at shell ,
/usr/sbin/pptpd --listen 192.123.45.4 --conf /etc/ppp/config/pptpd4.conf/usr/sbin/pptpd --listen 192.123.45.5 --conf /etc/ppp/config/pptpd5.conf/usr/sbin/pptpd --listen 192.123.45.6 --conf /etc/ppp/config/pptpd6.conf
After the command execute ,use the netstat to grep port are running or not :
netstat -ntlp | grep '1723'
Architecture diagram it was running like below:
192.123.45.4 —— 10.0.4.3 (/etc/ppp/config/pptpd4.conf) ——iptables postrouting —— 192.123.45.4
Open web browser google.com , search what is my ip ,it will showing your VPN ip , here you go !!!!!
Share to your friends if you found out this article is useful.


Leave a Reply
Want to join the discussion?Feel free to contribute!